If you work in heavy machinery, construction, or industrial automation, you already know just how critical lubrication joints are to keeping equipment running smoothly day in and day out. These simple, often overlooked components transfer grease or oil to moving parts like linear guides, bearings, and gear assemblies, preventing wear, reducing friction, and extending the service life of even the hardest-working machinery. But when these joints fail—whether they’re clogged with old, hardened lubricant, damaged by corrosion, or mismatched to your new equipment—you need to remove and service them correctly to avoid causing more harm than good. As someone who’s spent over a decade supplying, testing, and troubleshooting lubrication joints for industrial clients, I’ve seen too many techs rush this process, break threads, damage mating ports, or even contaminate internal lines because they skipped a few key steps. Today, I’m walking you through a step-by-step, safe way to remove a lubrication joint for servicing, with tips that come straight from the field and from the thousands of clients who’ve relied on our parts over the years. Lubrication Joint
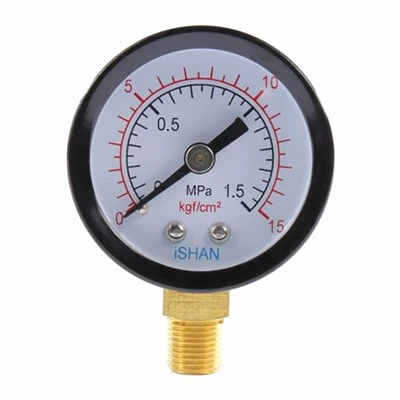
First, let’s get one thing straight: not all lubrication joints are the same, and that means your removal process will shift a little based on the type you’re working with. There are three main categories most of our clients use: push-to-fit (also called quick-connect) joints, threaded male adapters, and flanged joints for high-pressure systems. Quick-connects are the easiest to spot—they have a plastic or metal release collar that clicks into place when attached, commonly used for low-pressure lubrication lines. Threaded joints, which are far more common for medium and high-pressure setups, have external or internal threads that screw into the machine’s lubrication port, often with a hex nut for grip. Flanged joints are larger, bolted in place for heavy-duty industrial equipment like mining haul trucks or construction cranes. No matter which type you’re tackling, safety and preparation are non-negotiable. Before you touch any tool, turn off the equipment, disconnect the power source, and bleed all residual pressure from the lubrication line. This is the single most important step, and one that far too many people skip. Trapped pressure can cause the joint to snap off unexpectedly, spray lubricant at high speed, or send shrapnel flying—trust me, I’ve seen a technician get knocked back by a 3,000 PSI grease line that wasn’t bled, and it’s not a risk anyone needs to take. For most systems, bleeding is as simple as connecting a grease gun to the old joint and pulling the trigger slowly for 5-10 seconds, or opening the line’s pressure relief valve if your system has one. If you’re working on a closed-loop automatic lubrication system, check your equipment’s manual for specific bleed instructions—some require purging the entire line to clear residual pressure.
Once you’ve confirmed pressure is gone, your next step is to gather the right tools for the job. Using the wrong tools is a top cause of damaged joints and ports. For quick-connect joints, all you need is a small flathead screwdriver or the plastic release tool that most lubrication joint manufacturers supply with their parts—never use a pair of pliers to yank on the line, that can crack the plastic collar or bend the tubing. For threaded joints, you’ll need a hex wrench (Allen wrench) that fits the hex section of the joint, or a properly sized open-end wrench or socket. If the joint is stuck, never use a pipe wrench or channel locks without a protective jaw cover—these can round out the hex edges on the joint, making it impossible to grip later. For flanged joints, you’ll need a socket set matched to the bolt size and a rubber mallet to gently loosen stuck bolts without damaging the flange. I always keep a small bottle of penetrating oil (like WD-40 or a similar industrial-grade product) on hand too—if a joint has been in place for months or years, oil on the threads will make loosening it exponentially easier, and prevent you from having to force it.
Let’s start with the easiest type first: removing a push-to-fit quick-connect lubrication joint. Here, the process is designed to be tool-free for routine disassembly, which is why they’re so popular for maintenance shops. First, locate the release collar on the side of the joint. Most have a small tab or a ring you can squeeze or press. If your joint is on a line with metal tubing, you may need to press the release collar firmly with your thumb and hold it in place. For plastic tubing, you can use your flathead screwdriver to gently push the release tab, being careful not to scratch the plastic. Once the collar is held, gently pull the tubing away from the joint—do not twist it, twisting can cause the tubing to separate prematurely or leave a small piece of tubing stuck inside the joint’s barbs. If the joint won’t come free easily, double check that the release collar is fully depressed; sometimes debris or old lubricant gets caught in the collar, preventing it from releasing. I once had a client whose quick-connect joint was stuck because a buildup of grease had hardened in the release mechanism—we soaked the joint in degreaser for 10 minutes, and it slid right out no problem.
Now, for the more common threaded lubrication joint, which is where most beginners run into trouble. First, locate the hex head on the joint—this is the section you’ll grip to turn the joint. If you’re using an Allen wrench, make sure the wrench fits snugly into the hex; a loose wrench will round the edges, making future removal impossible. If you’re using a socket, pick a size that matches the hex exactly, and slide it all the way on so it doesn’t slip. Now, hold the wrench or socket steady in one hand, and use your other hand to turn the joint counterclockwise. Turn it slowly at first—if it’s been in place for a long time, it may take a little force to break the thread sealant that manufacturers use to prevent leaks. If it won’t budge, apply a small amount of penetrating oil to the threads, wait 5-10 minutes, then try again. Never use excessive force—if the joint won’t turn, stop and check for two common issues: first, make sure the line behind the joint is not kinked or twisted, which could cause stress on the joint; second, make sure you’re turning counterclockwise (clockwise will tighten it further). If the hex edges are already rounded, put a piece of rubber (like a rubber band or a cut piece of inner tube) around the joint before gripping with pliers—this adds friction and prevents slipping, and protects the joint’s surface from damage. A pro tip from our service team: if you’re working in a tight space where a standard wrench won’t fit, a flexible-head ratchet will get you access where a regular wrench can’t.
Once you’ve removed the joint, the next step is to inspect it before servicing or replacing it. This is a step many techs skip, but it’s crucial for catching issues early. First, check the threads on the joint and the mating port on your machine. Are there any burrs, cracks, or hardened grease buildup on the threads? If so, use a thread chaser (available at most industrial supply stores) to clean the threads—this ensures the new joint will seal properly, preventing leaks. Next, look at the interior of the joint: is there old, hardened grease or debris inside? Use a small wire brush (plastic bristle, not metal, to avoid scratching) or isopropyl alcohol to clean out the internal passages—clogged passages are the number one cause of inconsistent lubrication, so a thorough cleaning here will make your new joint work better. For high-pressure threaded joints, also check the O-ring or gasket that seals the joint to the port—if it’s cracked, brittle, or missing, you’ll need to replace it before installing the new joint, because a damaged seal will cause leaks. For quick-connect joints, check the plastic release collar: if it’s cracked or no longer clicks into place, the joint won’t stay attached to the line, so you’ll need a replacement.
Now, what if you run into a stuck joint that won’t come loose no matter what you try? This is a common problem, especially for joints that have been exposed to harsh conditions like dust, moisture, or extreme temperatures. First, don’t use a pipe wrench without padding, and don’t heat the joint with a torch unless it’s a metal joint and you’ve checked with your equipment’s manual. Heating a joint can damage the lubrication line, the machine’s port, or even the surrounding components, and if the joint is made of plastic, heat will melt it. If you must heat a metal joint, wrap the area around the joint in a wet rag to protect nearby parts, then use a heat gun (not a blowtorch) to warm the joint gently for 30 seconds—warmth will expand the metal slightly, making it easier to loosen. If the joint is still stuck, you can use a two-jaw puller designed for small threaded components—attach it to the hex head and pull slowly, being careful not to damage the threads. If all else fails, cut the line as close to the joint as possible, then use a pair of vise grips to grip the remaining piece of the joint and turn it counterclockwise. Once the old joint is out, clean the port thoroughly with a rag to remove any debris or old sealant before installing the new joint.
A big mistake we see a lot of new maintenance teams make is reusing old lubrication joints without considering their lifespan. Most lubrication joints are designed for 5,000 to 10,000 hours of use, or about 2-3 years of regular service, depending on the environment. If your joint is more than that, or if it’s shown signs of wear like cracks, leaks, or inconsistent flow, it’s better to replace it than to try to service it. Trying to fix a worn joint can lead to unexpected failures mid-job, which can cost you hours of downtime on a heavy machine.
Now, once you’ve finished inspecting and servicing the joint, you’ll want to reinstall it correctly to avoid future issues, but that’s a topic for another blog. The key takeaways here are: always bleed pressure before removing a joint, use the right tools for the type of joint you’re working with, be gentle to avoid damaging threads or ports, and inspect every joint before deciding to service or replace it.

At [supplier name], we’ve been providing high-quality lubrication joints for industrial equipment for over 12 years, and we work closely with maintenance teams like yours to get the right parts for every job. Whether you’re looking for quick-connect joints, threaded adapters, or custom flanged joints for a specialized piece of machinery, our team can help you choose the right part to fit your system, and offer guidance on installation and maintenance to keep your equipment running smoothly. If you’re tired of dealing with stuck joints, leaks, or inconsistent lubrication, or you’re looking to upgrade your current setup to prevent costly downtime, reach out to our procurement team today to discuss your specific needs. We’re here to help you find the right solution, no matter how big or small your project is.
Resistive Systems References
- Machinery Lubrication Magazine, “Safe Disassembly and Servicing of Lubrication Components”, 2021.
- Industrial Maintenance & Plant Operation Guide, “Threaded Component Removal Best Practices”, 2022.
- Quick-Connect Joint Manufacturer Standard, “Release and Disassembly Procedures for Push-to-Fit Lubrication Fittings”, 2020.
- Occupational Safety and Health Administration (OSHA), “Hazard Awareness for High-Pressure Fluid Systems”, 2019.
Sunshine Machinery Co., Ltd.
As one of the most professional lubrication joint manufacturers and suppliers in China, our products have good reputation in the market. Please rest assured to buy durable lubrication joint made in China here from our factory. For price consultation, contact us.
Address: No.852, Qingfeng South Road (South), Tongxiang City, Zhejiang Province
E-mail: export@ishan.com.cn
WebSite: https://www.ishanlube.com/
